Create a notes app with Squid, Next.js, and Netlify
Use Squid as a backend to build a full-stack notes app deployed on Netlify.
What you'll build:
- A notes application that uses Squid Cloud and Next.js running on Netlify.
- The app uses Squid's built-in database, making it quick to set up and run.
What you'll learn:
- Querying and rendering data both on the server and the client while keeping it up-to-date in real time.
- Mutating data on the client.
- Configuring the Squid Client SDK to work with Netlify environment variables.
You'll need some experience with TypeScript. Experience with Next.js and Netlify is useful, but not required.
Environment setup
- Install the Squid CLI using the following command:
npm install -g @squidcloud/cli
- Download the notes-app code sample:
squid init-sample notes-app --template notes-app
- Install the Netlify CLI using the following command:
npm install -g netlify-cli
Set up the Squid backend
There are two subfolders that make up the notes-app project: frontend and backend. The backend folder contains the Squid backend for the app.
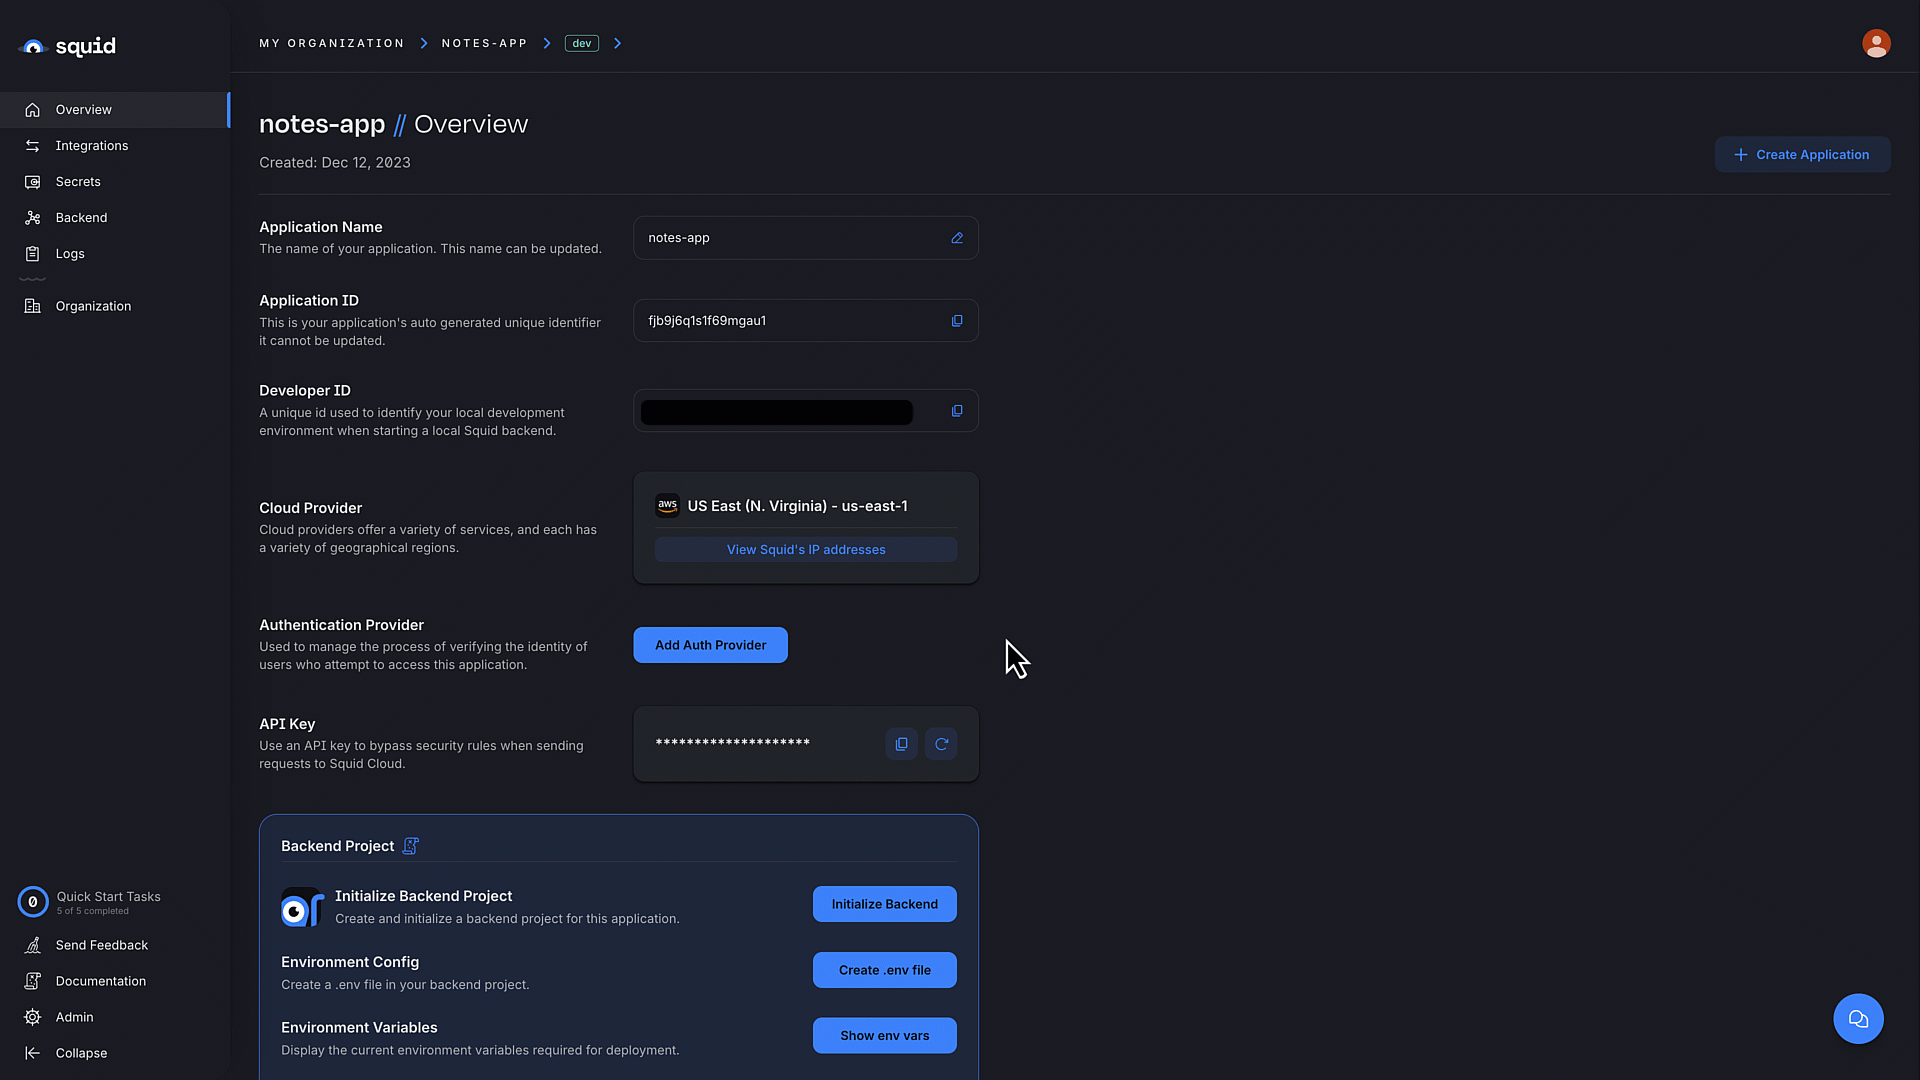
- Navigate to the Squid Cloud Console and create a new application named
notes-app.
- In the Squid Cloud Console, navigate to the application overview page and scroll to the Backend project section. Click Create .env file and copy the command.
- In the terminal, change to the backend directory:
cd backend
- Create the
.envfile using the command you copied from the console. The command has the following format:
squid init-env \
--appId YOUR_APP_ID \
--apiKey YOUR_API_KEY \
--environmentId dev \
--squidDeveloperId YOUR_SQUID_DEVELOPER_KEY \
--region us-east-1.aws
- Install the required dependencies:
npm install
The backend is now set up and ready to use with a frontend!
Configure the Next.js frontend
The following steps add configuration parameters to connect the application to Squid and Next.js.
- Open a new terminal window and navigate to the notes app frontend. You should now have two open terminal windows: one for the app's backend and one for the frontend.
cd notes-app/frontend
- Install the required dependencies:
npm install
- Create the Netlify project:
netlify sites:create
- Create a
.env.localfile:
touch .env.local
- Add the following code to the
.env.localfile, replacing the placeholder with your Squid developer ID. You can find the ID in the.envfile of your backend and in the Squid Cloud Console.
SQUID_DEVELOPER_ID=YOUR_SQUID_DEVELOPER_ID
- Open the
netlify.tomlfile. Replace the placeholder with your app ID. The app ID is found in the.envfile of your backend and in the Squid Cloud Console.
...
SQUID_APP_ID = "YOUR_APP_ID"
...
Check out the notes app components

The notes app has three main components that manage the app's appearance and behavior:
NoteItem- Display each note in the list of notes.NoteList- Renders the list of notes and shows theNoteModalcomponent when a user adds a new note or updates an existing note.NoteModal- When adding a note, this modal appears so the user can write the title and content of the note.
Here's an overview of the ways Squid seamlessly handles the notes data in real time:
- In the
handleSavefunction, Squid saves notes to the database:
await collection.doc(id).update({
  title,
  content,
  timestamp,
});
- Squid also handles deleting notes:
collection.doc(id).delete();
- In the
Homefunction, Squid gets realtime updates from the database using this function:
await squid
  .collection<Note>('notes')
  .query()
  .sortBy('timestamp', false)
  .dereference();
Run the notes application locally
- Start the Squid backend locally using the following command in the terminal opened to your notes app backend:
squid start
- Start the Next.js frontend using the following command in the terminal opened to your notes app frontend:
netlify dev --live
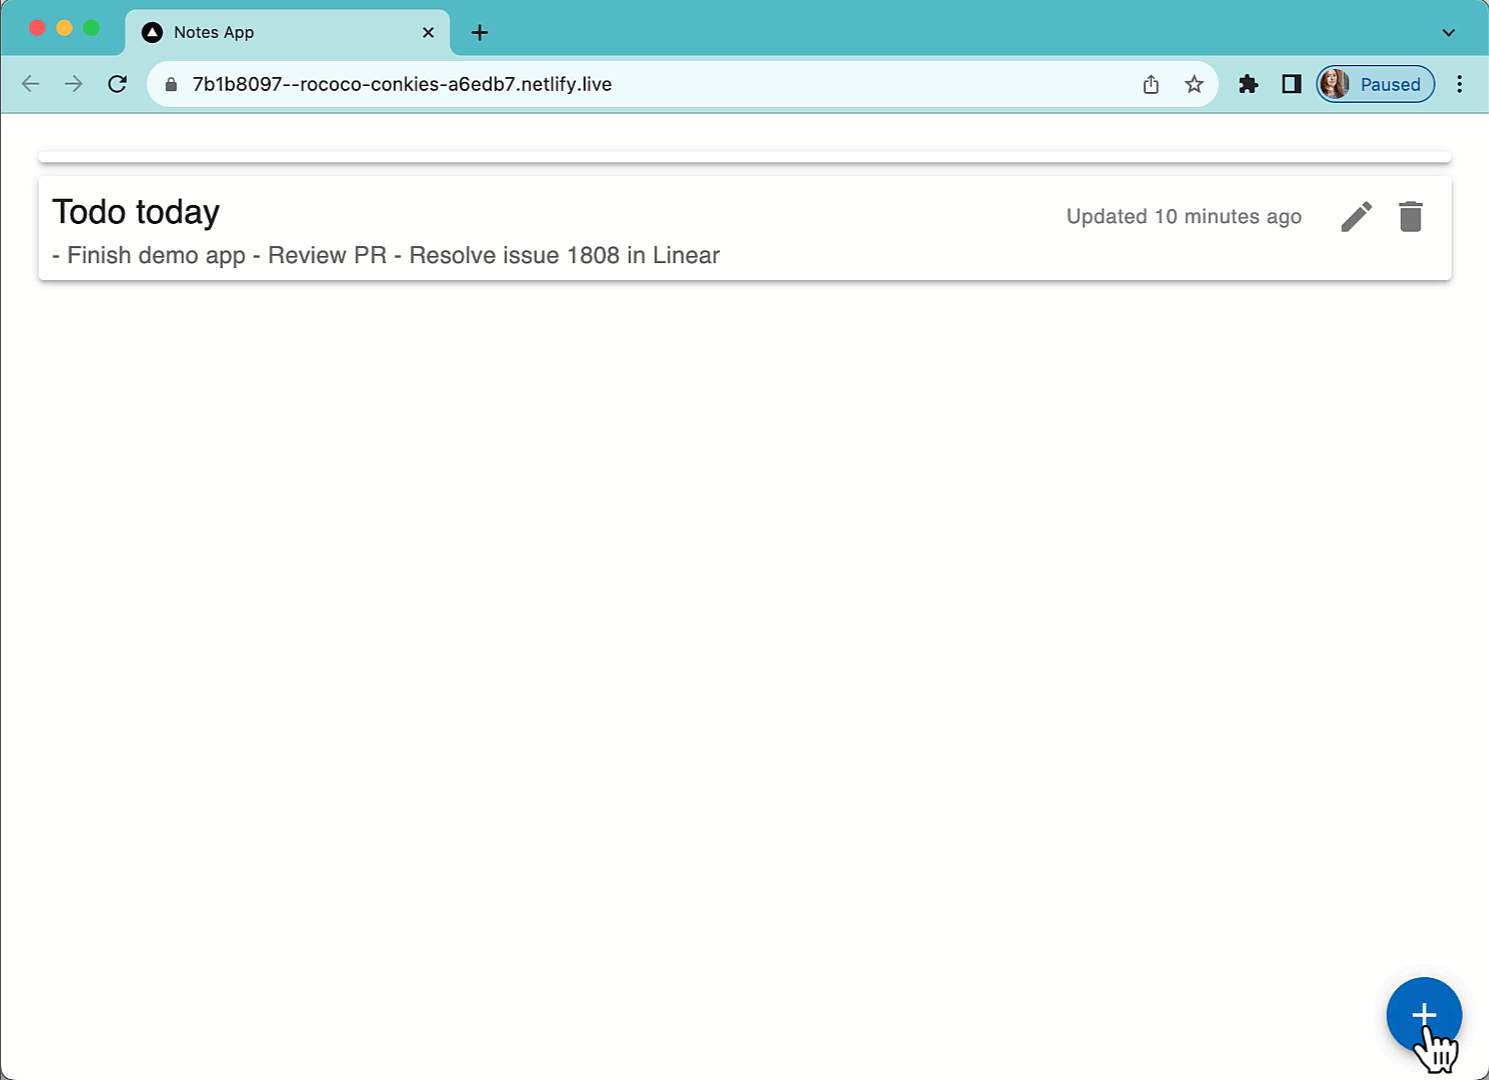
Once the Netlify finishes setting up the local server, the terminal logs a link to the application in the format http://[RANDOM_ID].netlify.live. Click the link to open the notes app.
And that's it!
Congratulations! You have successfully created a note-taking application that uses Next.js and Squid, and then you served it locally on Netlify. Together with Netlify, Squid makes it seamless to build and deploy applications that are powered by real-time data and can scale to millions of users.
Here are some things to try next:
- Build a React CRUD app to try out the basics of the Squid React SDK.
- Learn how to deploy your Squid backend.
- Read the Client SDK documentation to learn more about Squid's data querying capabilities.
- Secure your app data using the Squid Backend SDK
- View available Integrations to see how to connect Squid to your database, auth, and API tools.
- For more information on using Next.js and Squid, check out this tutorial.
- For more on full stack apps with Squid and Netlify, view this tutorial.
Additional notes
Notes app functionality
Create some notes in the app and notice the following:
When clicking
Add Notein the modal, the new note shows up in the list of notes while the modal takes a fraction of a second to close. This is because the Squid Client SDK makes optimistic updates, meaning it updates the local state while also sending the mutation to the server. If the server update fails, the client will fallback to the previous data.Open a new tab and navigate to the same url. Notice that the notes you created show up right away. This is because the app uses the
withServerQueryserver component which will fetch the data on the server and send it pre-rendered to the client. This is a great way to improve the performance of your application.Interacting with the notes list on one tab will update the notes list on the other tab. This is because the Squid Client SDK will automatically subscribe to changes to the data and update the local state.
Squid Cloud environments
- Squid provides two different target environments:
devfor development andprodfor production. For this tutorial, we use thedevenvironment. To learn more, read about Squid's environments. - Your Squid developer ID is only used when running the project locally.
- Since it's only for local development, the
SQUID_DEVELOPER_IDincontext.prod.environmentis intentionally left blank because it is set in the.env.localfile for development purposes only. Adding it to thenetlify.tomlfile as blank will ensure that it is not included in the production build.
Squid Cloud functionality
- When using the Squid Cloud built-in database, your Squid backend is fully functional without additional customization. You can also add features to the Squid backend like Schedulers, Triggers in response to database events, native queries for executing raw SQL or database-specific queries, and more. See the Backend SDK docs to check out all the options.
- Since the built-in database is document-based, the notes collection represents a collection of documents. When using a SQL database, the collection represents a table where documents are rows of the table.
Next.js links
- The
Notesfunction inlayout.tsxis a Next.js server component. To learn more about Next.js server components, see Next.js Server Components documentation. - The
'use client'at the beginning of theNoteList.tsxfile indicates to Next.js that this file should be rendered on the client. To learn more about Next.js client components, see Next.js Client Components documentation.