Build a full-stack app in minutes!
Welcome to Squid! Squid offers a versatile platform for developing applications and communicating between the client and the backend. Squid's flexible AI features make it easy for software developers to become AI practitioners. Learn the basics of the Squid platform's powerful capabilities through a full-stack to-do application.
Getting started
Navigate to the Squid Cloud Console. There, you'll find welcome page where you can choose one of two projects to build: a to-do app or an ai-powered chat widget.
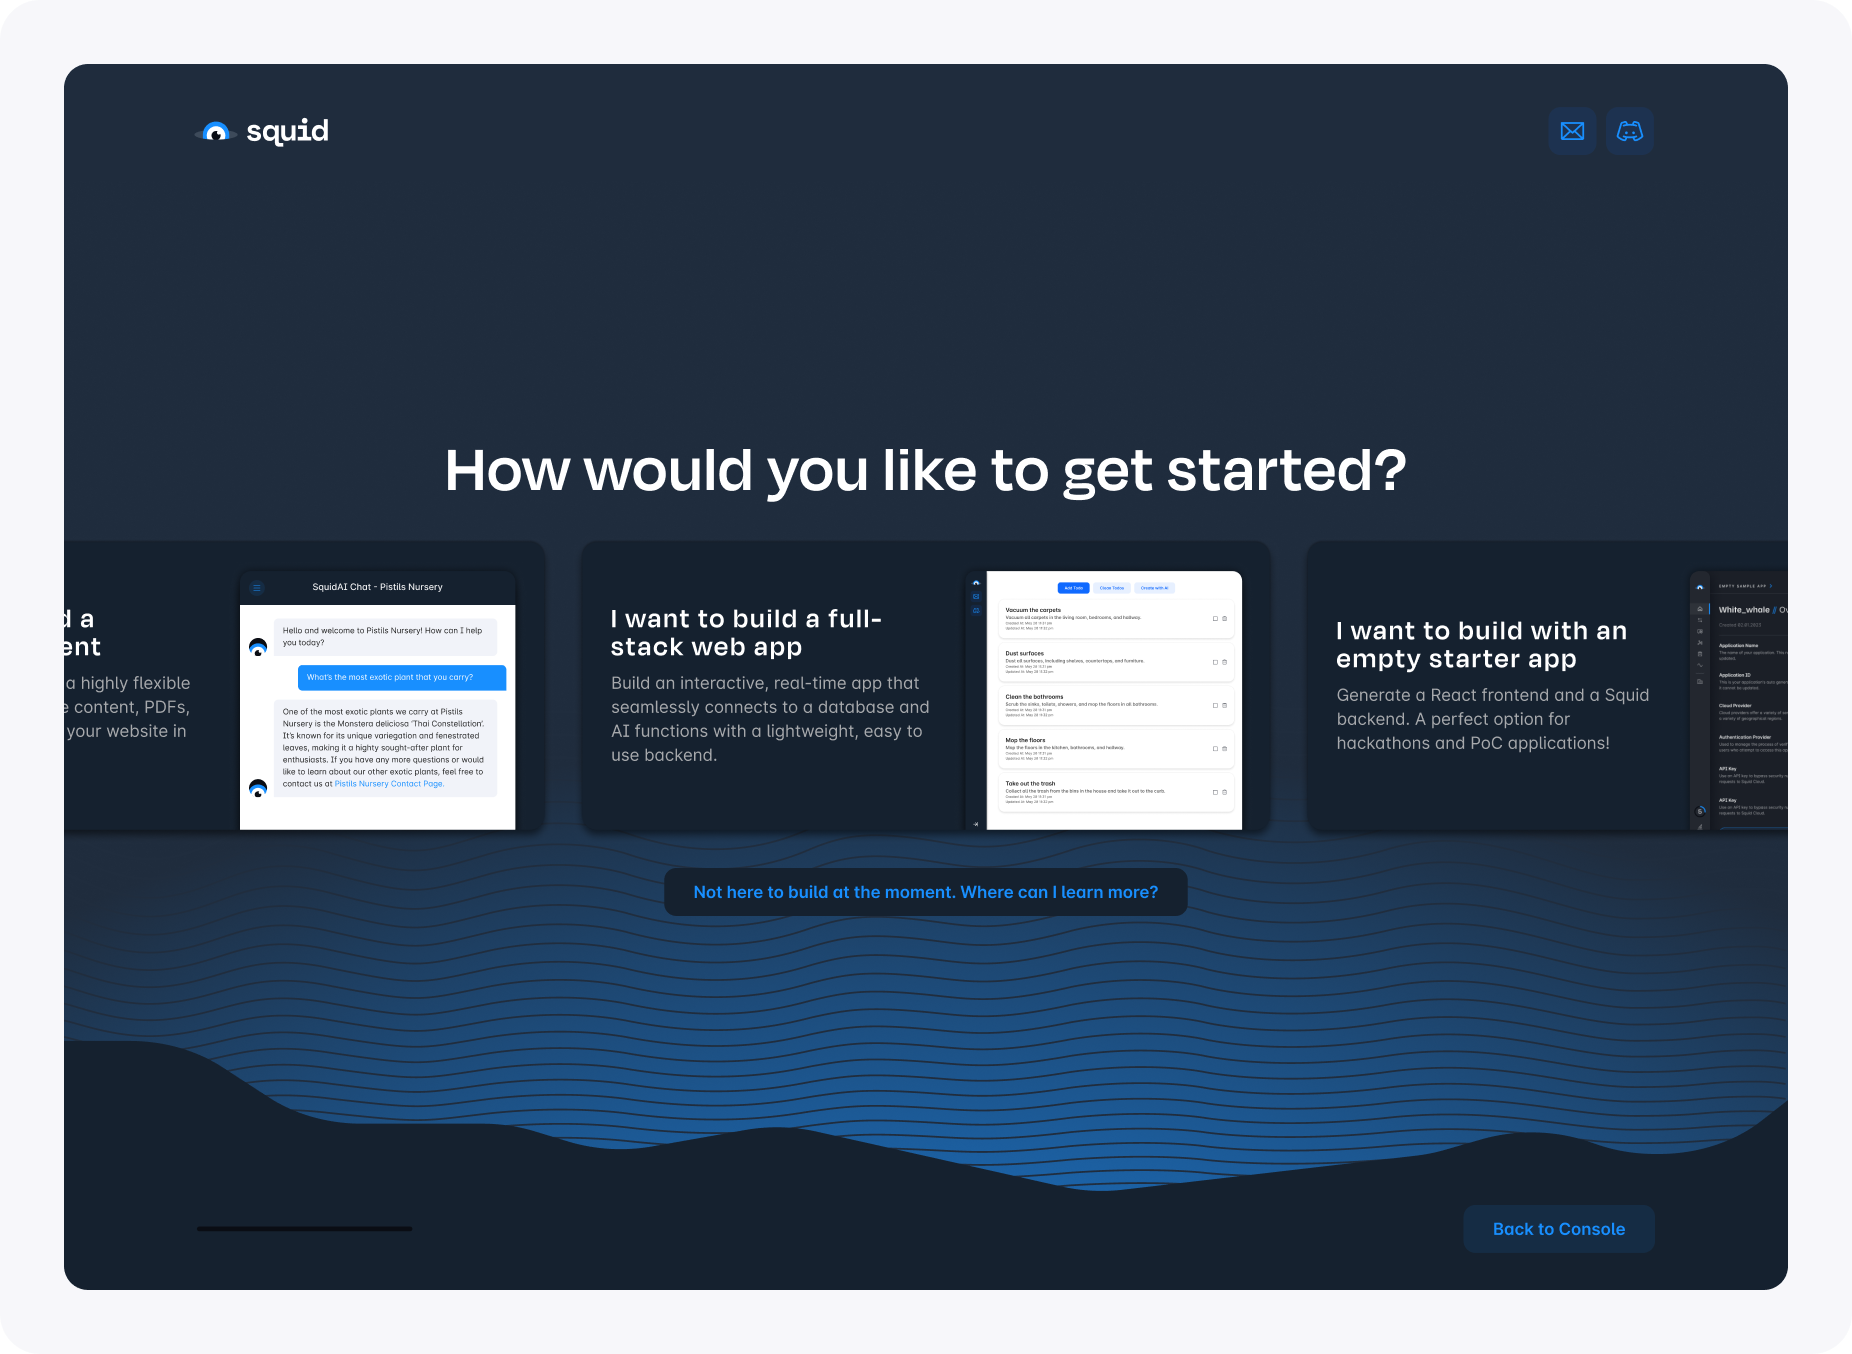
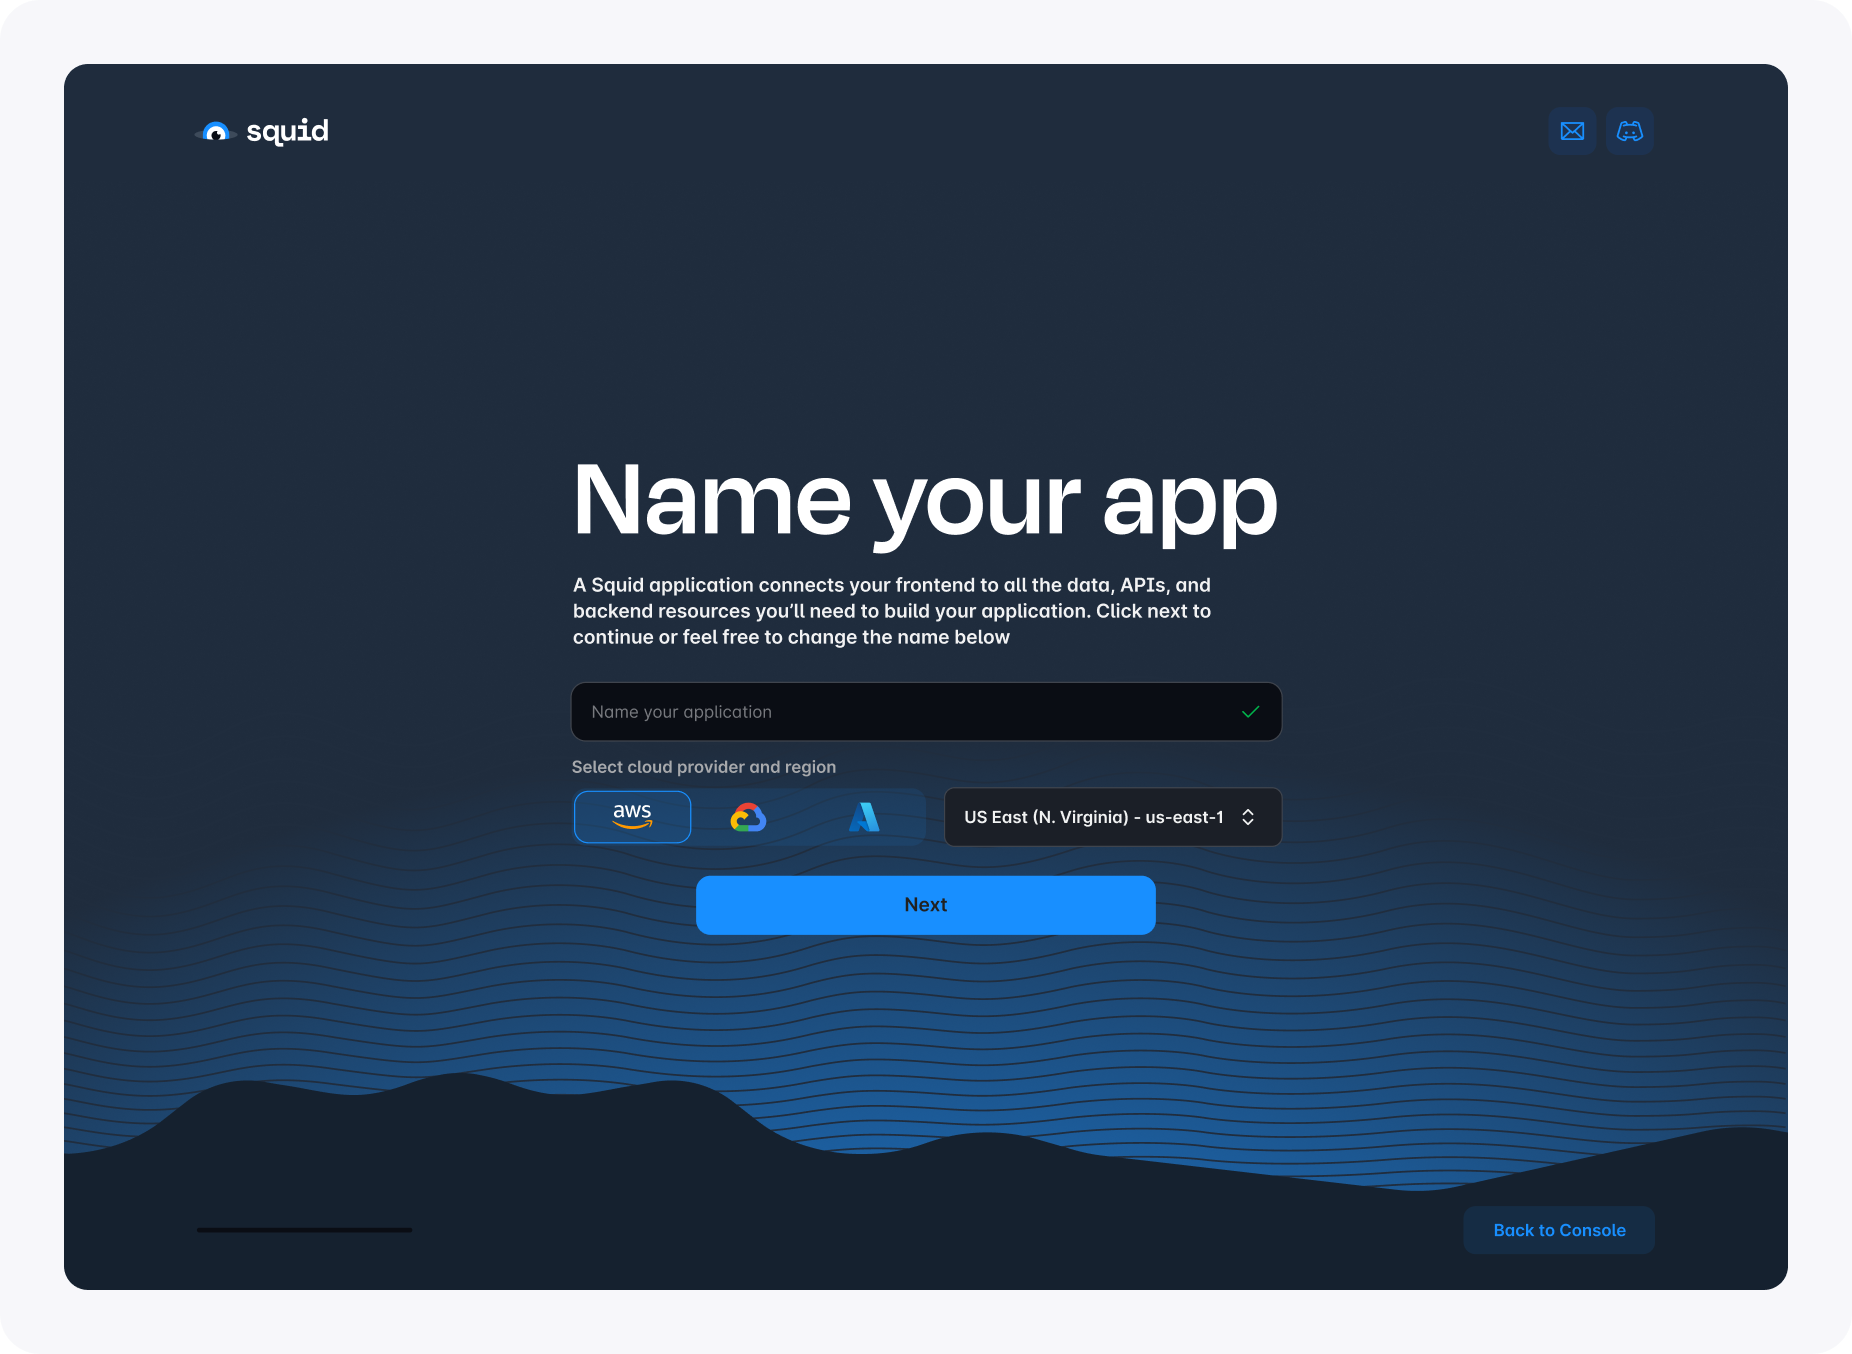
Click I want to build a full-stack web app to select the to-do option. From there, you are prompted to name your new application. Choose whatever name you want. Since it is a to-do app, you might want to name the app something that makes it recognizable, like "To-Do".
Continue to the next step. Here, you see three commands to run in order to set up the sample application. To run the commands, first install the latest version of Node.js.
Copy the commands and run them in your terminal. This creates a new folder for the project's code in your current directory, so make sure you are in the right place to store your code.
Follow the steps from the console to automatically populate the initialization commands with the correct values.
After running the final command, your application will be up and running locally at http://localhost:5173/!
From there, follow the tutorial steps within the app to add features and learn about Squid's Client and Backend SDKs. Everything you need to know is built right into the app. If you want to dive deeper into any of the features shown in the app and tutorial, then you can return to this page to get additional information.
The to-do app
The to-do app and accompanying tutorial showcase how to add Squid features to an application. Each section of the tutorial gives a brief description of the feature being added. Here, we'll look closer at each step taken.
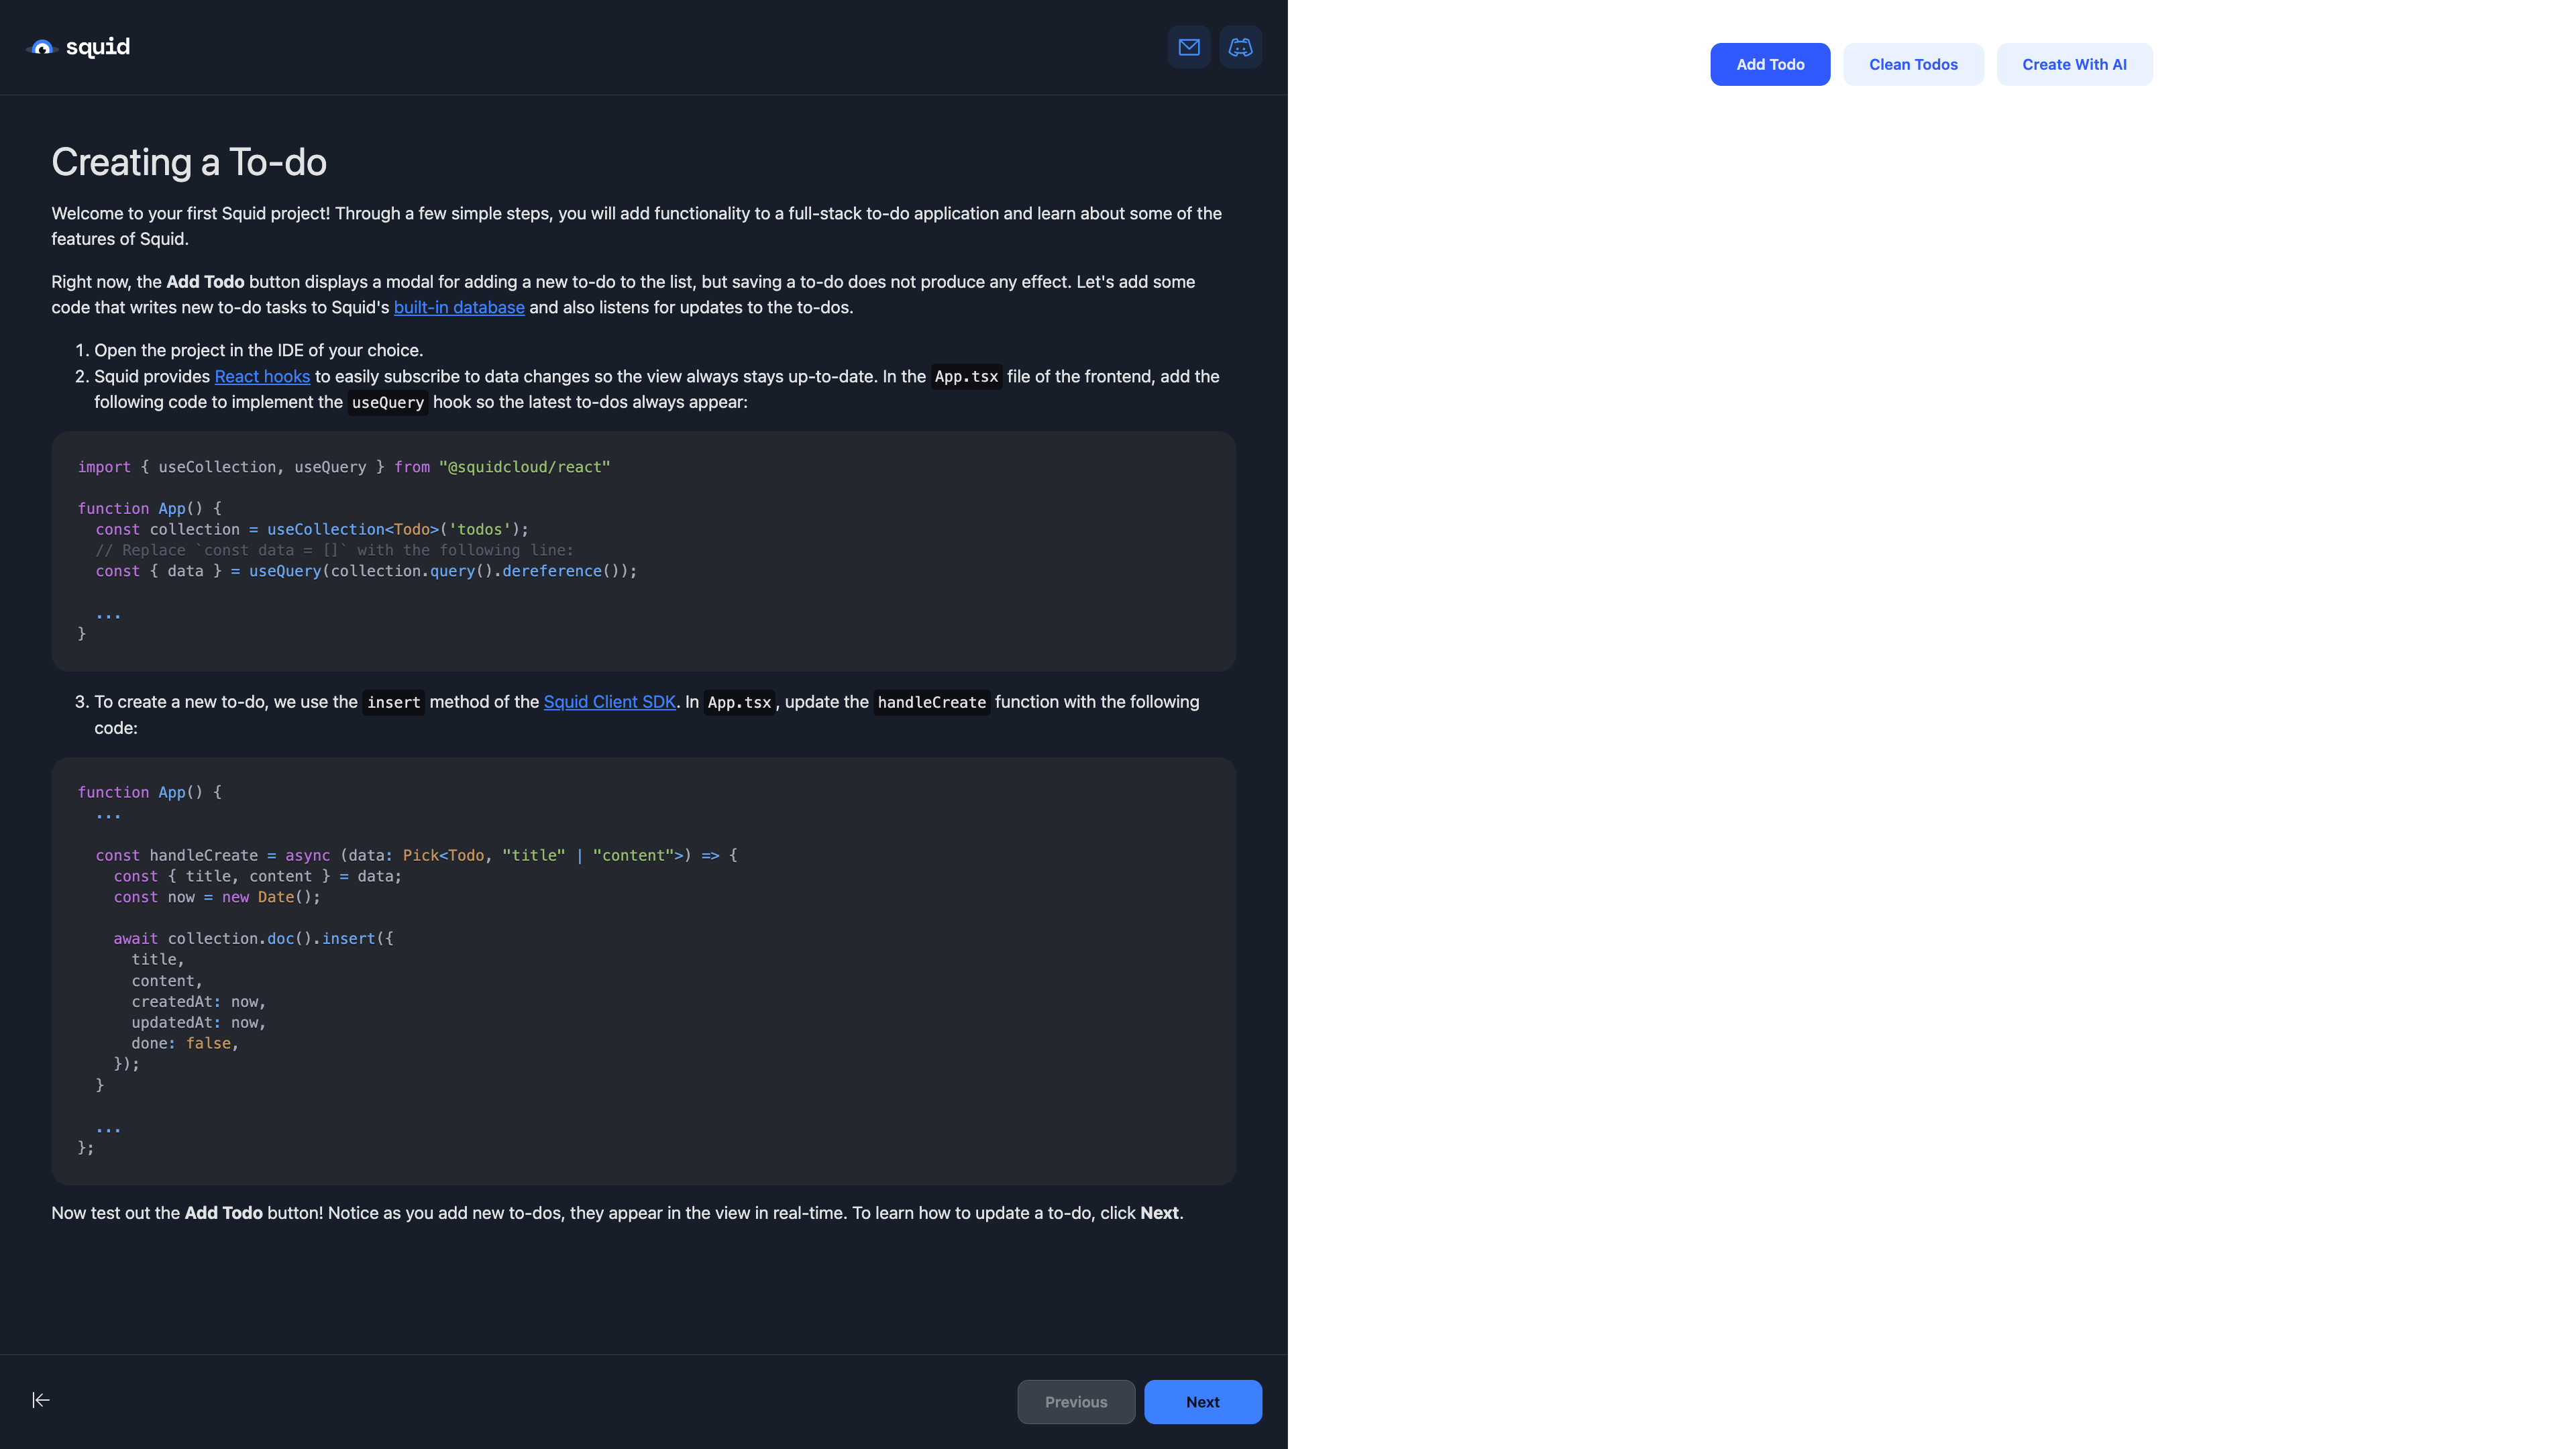
Creating a To-do
The built-in database
Notice you are able to insert and query data out of the box without needing to connect an external data source. Squid Cloud provides a built-in NoSQL database instance for your app so you can get up and running right away. If you need to connect other data sources, you provide some information about the data source in the Squid Cloud Console and you're connected in moments. To find out more about database integrations, view the documentation.
Working with data
Squid Cloud organizes data into collections and documents. When connecting to a SQL database, a collection represents a data table and a document represents a row in a given table. When connecting to a NoSQL database, a collection represents a collection of documents. Once you're familiar with Squid's system of collections and documents, you'll know how to create, read, update, and delete data from any database!
React hooks
Squid's React SDK includes custom hooks for stateful actions on Squid features. For example, the useCollection allows for easy access to a database collection, and useQuery gives you access to data from a given query. By default, useQuery subscribes to data changes, letting you create responsive views in as little as one line of code.
Updating a To-do
To update data in a document, use the update method on the document, passing the changes you want to make. When using update, only the fields passed to update will be changed--it will not override any other existing fields.
await collection.doc(id).update({ done: true });
To delete a document, use the delete method.
await collection.doc(id).delete();
Notice for both methods, you need the document's id. The id is unique to the collection and distinguishes documents from one another. The id can be random or significant. Often, you will use one or more fields from your document as the id. Here are some examples of valid ids:
'ABC123def'
{ userId: 'SquidCloud123' }
{ customerId: '123abc', orderId: 'ABC123def' }
Creating an Executable
Often times, you will encounter situations where you want a client application to access server-side code. For example:
- You want to call a service that requires a private API key that shouldn't be exposed to a client.
- You have a service with admin privileges and you want to restrict the client to take only specific actions.
- You need to take a resource-intensive action that you don't want to perform on an edge device.
For such cases, use Squid's Executable feature. In the Squid backend, you can make any function into an executable using the @executable decorator:
@executable()
async cleanTodos(): Promise<void> {
  await this.cleanTodosInternal();
}
Then in your client app, you can call the function using executeFunction and passing the name of the function as a string:
await squid.executeFunction('cleanTodos');
To learn more about Executables, view the documentation.
Adding a Trigger
There are many scenarios in which you will want to trigger a function to run when some change occurs in your data. For example:
- Order processing in E-commerce: When a new order is placed and recorded in a database, a function could be triggered to check inventory, update the stock levels, and initiate the shipping process.
- Audit logging: For compliance and security monitoring, companies often need to keep detailed logs of who accessed or modified data.
- Real-time data synchronization: In systems where multiple databases need to stay synchronized (like in distributed systems), a change in one database can trigger a function to replicate the change to other databases.
Squid Cloud provides Triggers that can run code in response to data changes. And since Squid can connect to any database, you can respond to data changes no matter where that data lives.
To mark a function as a Trigger, use the @trigger decorator, passing the database collection, data mutation type on which the function triggers, and optionally, the ID of the database integration. If no ID is provided, then the function triggers from the built-in database.
@trigger({
  collection: "todos",
  mutationTypes: ["update"],
})
async onUpdateTodo(request: TriggerRequest): Promise<void> {
  const { docBefore, docAfter } = request;
  if (docBefore.done === docAfter.done) return;

  await this.squid.collection<Todo>("todos").doc(docAfter.__id).update({
    updatedAt: new Date(),
  });
}
To learn more about Triggers, view the documentation.
Adding a Scheduler
Schedulers allow you to run functions on a specified schedule. Here are some common uses cases for Schedulers:
- Running periodic audits: Combine a Scheduler with Squid AI Chatbot to review data for compliance.
- Generate reports: Combine a Scheduler with Query with AI to generate charts and insights from your data, and then send out weekly reports.
To mark a function as a Scheduler, use the @scheduler decorator and provide the cadence at which the Scheduler should run.
  @scheduler({
    cron: CronExpression.EVERY_10_SECONDS
  })
  async cleanTodosOnSchedule(): Promise<void> {
    await this.cleanTodosInternal();
  }
To learn more about Schedulers, view the documentation.
Adding a Webhook
A Webhook is a type of event-driven architecture that allows one web application to communicate with another. Many external services communicate through webhooks. For example:
- Payment service updates: Your payment service might provide webhooks to inform you about events like generating invoices and paying balances so you can take action in response, like updating invoice status in a database.
- Automate CRM data: Update customer data in a database based on CRM updates.
- E-commerce updates: Automatically notify customers when the status of their order changes, or stay informed of inventory changes.
To mark a function as a webhook, use the @webhook decorator, passing a string as an identifier. This string becomes part of the URL endpoint for the webhook.
@webhook("createTodo")
async createTodo(request: WebhookRequest): Promise<WebhookResponse> {
  const { title, content } = request.queryParams;
  if (!title || !content) {
    return this.createWebhookResponse("Invalid request", 400);
  }

  const id = await this.createTodoInternal(title, content)
  return this.createWebhookResponse(`Todo created: ${id}`, 200);
}
To learn more about Webhooks, view the documentaiton.
Adding AI
Squid AI Assistant lets you manage AI assistant instances, conversation threads, and context files to create AI workflows, automate tasks, or build a unique AI experience for users. The AI Assistant is one of many AI solutions offered by Squid.
To query the AI assistant, create an assistant with the instructions and any related functions, and then prompt the assistant using the queryAssistant method:
const assistant = this.squid.ai().assistant();
const assistantId = await assistant.createAssistant(
  "todoCreator",
  "You are designed to create todo list items based on the specified task. You should create anywhere between 3-5 todos.",
  ["createTodoFromAssistant"],
);
const threadId = await assistant.createThread(assistantId);

await assistant.queryAssistant(
  assistantId,
  threadId,
  `Create some todos for the following task: ${task}`,
);
To learn more about Squid's AI features, view the documentation.
Next steps
Congratulations on completing the onboarding tutorial app! To try out more AI features of Squid, you can return to onboarding and build an AI Chatbot Widget.
To learn the basics of using Squid, check out our Getting Started Tutorial, where you will make a simple stub project that implements the basic functionality of a database.
To find out more about all Squid has to offer, continue reading our documentation or check out one of our other tutorials.